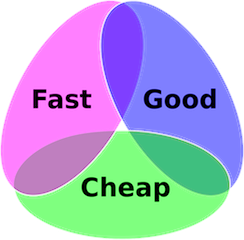
Use design controls for innovation

In the movie Wolf of Wall Street, Leonardo DeCaprio challenged his team to “sell me this pen,” implying that a good salesperson could sell anything.

This article helps teams “design a pen” using design controls in a way that sparks innovation. I wrote it for the biotech or medical device industries but the concepts apply to any company that must share work among a team. We go from defining user needs to transferring design into manufacturing.


Background

Governments require that companies selling medical devices adhere to design control regulations. The most common references are the FDA 21 CFR 820.30 and ISO 13485. You can learn more in my article on design control regulations.

Design controls for innovation

I’ll cover ten topics for design control, sharing advice for innovation and efficiency with examples of designing a pen.
  • Design & Development Planning 21CFR 820.30 (b)
  • Design Input 21CFR 820.30 (c)
  • Design Output 21CFR 820.30 (d
  • Design Review 21CFR 820.30 (e)
  • Design Verification 21CFR 820.30 (f)
  • Design Validation 21CFR 820.30 (g)
  • Design Transfer 21CFR 820.30 (h)
  • Design Changes 21CFR 820.30 (i)
  • Design History File 21CFR 820.30 (j)

Create a plan

One of the seven habits of highly effective people is to start with the end in mind. Design planning is just that, starting with the end in mind and listing all steps necessary to achieve your goal.
A plan is a detailed method for designing your product, including design input, or what the product must accomplish, who’s responsible for each aspect, how you’ll measure success, etc.  You don’t have to know everything to begin, but you can leave blanks for what you know you’ll eventually have to do, such as create an input document.

Phrase Goals Wisely

The apocryphal story of Russians using a pencil in space serves as a lesson in understanding user needs: they didn’t need a pen, they needed to write in space.


Your ability to innovate begins when you’re defining your goals and brainstorming solutions, before design controls begin.

Phrasing matters. Consider the differences in these goals:

  1. Make this pen
  2. Design a pen
  3. Solve the customer’s needs
  4. Revolutionize the pen market
“Make this pen” could result in a high-quality writing instrument but won’t lead to innovation. “Revolutionize the pen market” is difficult for most companies and works best for entrepreneurs or researchers. The middle way between these extremes may be “design a pen.”

There’s no right or wrong, just be aware that your choice will impact your team’s work. Practice phrasing how you’d solve a problem around your home, for work, or with your kids. Over time you’ll become wise at phrasing the first question so that other people have enough information to begin but enough ambiguity to allow creativity.

Understand user needs

Understanding user needs is more than just listening to your customers, it’s also trying to understand their situation and acknowledging that they are conditioned by previous experiences.

Innovative products can’t be requested because most people start with what they already know. With practice, you learn to balance making what they ask for and innovating something they’ll appreciate.

A way to innovate medical devices is to immerse with healthcare providers, looking at their situations with a fresh perspective, identifying the underlying user needs. This is the method behind the Standford University BioDesign program, a year-long process where participants spend three months in operating rooms before brainstorming new product ideas. They begin with understanding the intended use, the problem they are solving. Then they empathize with users, and phrase user needs narrowly enough to focus but broadly enough to allow creativity. Only then do they begin brainstorming solutions.

Intended use

For our pen, let’s say that we immersed with surgeons and learned that they’d benefit from a pen that can mark on a patient’s body during surgery, allowing a team to visualize and agree upon incisions path for procedure modifications during a surgery.

User needs

We’ll define our typical user as a surgeon, experienced with operating-room procedures but busy with many other things during surgery and unlikely to focus on a complex design. Their needs will probably be broadly defined.

For our pen, assume the following user needs:

  1. #UN1 visible on a range of patients’ skin colors
  2. #UN2 sterile pen
  3. #UN3 sterile and non-toxic ink
  4. #UN4 easy to hold and use

Step #4, Input document

Design inputs build upon user needs to define what your product needs to accomplish. Most companies clarify user needs and marketing requirements into what is confusingly called design requirements. The purpose of design requirements is to remove ambiguity, to provide clearly defined requirements that can be understood by engineering teams. Effective requirements can be tested: a user need of “light weight” should be refined to “under 0.75 lbs” as a design requirement.
Design inputs should be narrow enough to focus development but broad enough to allow innovation and efficiency.
For design controls, only user needs and regulatory requirements are necessary. User needs implies risk management. Most companies add other requirements. Some use separate documents, some have sections within their input document. For this article, let’s assume a few “needs” documents, which may also be called “requirements.” Don’t get stuck on words, many other documents are often referred to as “requirements.”
Regulatory needs

  1. #RN1 Must use ink or marking material that’s approved by regulatory agencies in the United States and European Union
Business requirements

  1. #BN1 Must be color-coded to match corporate brand: “blanched almond,” hex code “ffebcd.”
  2. #BN2 Must fit into existing packaging of other products (maximum of 6.0 inches long, 0.5″X0.5″ wide and deep
  3. #BN3 Must cost less than $1 for final products made in orders of >1,000 per month
  4. ou could use your input document to outsource research and development. I’ve worked with innovative companies sent our input document to contract design companies to get diverse solutions to the same problem; our contract ensured we would own any patents.
System-level requirements

  1. #SR1 ink must not leak when pen shaken by a typical user*#SR2 ink and pen able to be sterilized using gamma radiation#SR3 able to be used 10 times without failing**

Mechanical requirements

  1. #MR1 must not slip out of hands in a typical hospital surgery room environment*
  2. #MR2 greater than 4.0 inches and less than 6.0 inches long
  3. #MR3 Must be less than 0.5″ wide or deep, and greater than 0.25″ wide or deep
  4. #MR4 weigh between 2 and 4 ounces**
  5. #MR5 the color of the outside must be “blanched almond,” hex color code “ffebcd”
Ink requirements

  1. #IR1color = black, hex code “000000”*
Similarly, you could have packaging requirements, labeling requirements, etc.

An underlying problem with medical devices our users are patients, not the physicians that drive much of our work. We forget to include unspoken patient needs. This isn’t intentional, it’s the result of a society where most executives, managers, and even engineers are white males and may not empathize with diverse users. Consider this simple example from an automatic soap dispenser that used infrared lasers to turn on water but only for white hands:

Last year the person filming a soap dispenser that only worked on white hands Tweeted:
“If you have ever had a problem grasping the importance of diversity in tech and its impact on society, watch this video”

Not considering diverse users for a soap dispenser is inconvenient; not considering diverse users for medical device design can be life-threatening. Let’s assume we learned this, then went back and changed the requirements document.
Ink requirements, version 2:

  1. #IR1 color = silver, hex code “??????”
  2. #IR2 color able to be seen on typical patients’ skin, including diverse races, in typical operating room lighting
Your requirements may continue to evolve as you learn more, including learning that what you originally stated is ambiguous for other team members. For example, phrases like the pen should be “able to be used 10 times without failing” is ambiguous; under which conditions?
Words are ambiguous to everyone except the person saying them, so I advise companies to have test protocols defined during early-stage input meetings. This can be as simple as “able to be used 10 times in a worse-case scenario of being dropped from 5 feet and stepped on,” which is effective communication for a diverse team.

Design Reviews

You’ll have many different reviews, some for high-level, such as the development planning and design inputs, and some for detailed work such as mechanical design teams, packaging design teams, etc. The FDA requires that each review has at least one person uninvolved with that responsibility; this is to maintain diversity in thinking and minimize conflicts of interest.
It’s important to remember that you’ll have two main sets of reviews, one to agree on design inputs, the other to verify that your verification and validation testing of outputs meets all input requirements. Those could be higher-level meetings, allowing most design meetings to be focused with the team responsible.
In other words, senior management authorizes a plan and design input so that focused teams can create innovative designs without high-level meetings. These teams will be creating design output.

Design Outputs

Design outputs are how you solve the inputs. Outputs include drawings, software, test methods, etc.

Each team uses the input document or their requirements document to design solutions, often starting with simple drawings or prototypes that can include software codes, electrical components, mechanical features, regulatory labels, packaging, final-product inspection criteria, etc, all of which are considered design outputs.

In other words, you’re given inputs and you create outputs.

For our pen example, consider the requirement for ink to be visible on diverse patient’s skin colors. One solution could be a silver-colored ink, which I believe should be considered an output; this allows room to learn and improve the color of ink and to change the output documents without needing to also change input documents. If the input requirement were “silver” then teams would stop looking for more effective colors that still meet input requirements.

I advise keeping input documents high-level to allow teams to focus on continuously improvement by iterating outputs. High-level inputs allow a team to “design a pen” rather than “make this pen.”
Make sure you plan time to iterate your outputs, returning to your input document to update new risk-management information when necessary. Time to iterate, to continuously improve based on lessons learned, is the most important aspect of innovation.

Verification & Validation

Verification testing ensures that your design outputs satisfy input requirements. Requirements like “greater than 4 inches and less than 6 inches long” can be verified in a laboratory, and if we have clear input requirements we know how to design a verification test. For example, 4.0 inches tells us that the accuracy must be to +/1 0.01 inches, and a color’s hex code of “ffebcd” is unambiguous and can be measured rather than interpreted.
Validation ensures inputs are met for outputs that can not be measured, such as user needs and testing that relies on statistics.
For example, verifying 100% of our ink would be impractical, so we would validate each batch by testing a sample and applying statistics to ensure it’s a sample that’s representative of the entire batch.
Similarly, a user need of “easy to hold” can’t be tested in a laboratory and must be validated by user testing in simulated situations. Our pen may work well in a laboratory but could be dropped by a surgeon wearing gloves made slippery by body fluids – ensure your test protocols simulate real-world use.
Some of the best advice I was given comes from the Stanford Biodesign program: create your verification and validation test protocols early, with the input document, so that all work can be continuously compared against what will become final tests before product approval. Initial descriptions would also guide teams in designing thorough test protocols.
Verification tests

  1. Ver#1 Scales used to weigh shall be accurate to at least +/- 0.01 ouncesVer#2 Colors shall be verified using color-codes, either hex or RGB

Validation tests

  1. Val#1 The design must work after having 10 tests of being dropped from 5 feet and simulated being stepped on by a 200 lb person wearing tennis shoesVal#2 All design features that can not be simulated or tested, such as “ease of use” shall undergo a validation test with real-world users representing the typical user defined in our input document (education level, experience level, cultural background, etc.)
Some requirements must be tested to worse-case extremes, such as “able to be used 10 times without failing.” You could simulate a worse-case scenario in a laboratory by removing the cap, dropping it, and stepping on it 10 times before writing with it. This is a form of validation usually combined with manufacturing requirements; when you can’t 100% of your products you must test a small percentage of them and validate that the results are statistically relevant for all products manufactured. As an example, we wouldn’t test each pen to failure, but we could test 10 out of every 1,000 manufactured to ensure quality-control between each batch made.
For initial design planning it’s fine to have generalized test descriptions, but all tests should be refined throughout the development process, becoming complete and unambiguous so that anyone would have all information necessary to repeat the tests, including which equipment to use and the level of accuracy required.
Miscommunications are common; think of validation a way to ensure that the user gets what they need despite the bureaucracy of regulated companies.

Design Changes & Design History File

A Design History File (DHF) is evidence that a product was developed according to a Plan, including references to the locations of all plans, inputs, outputs, verification, validation, and transfer procedures. This is helped by tracking all design changes through document control, a core function of a company’s quality system.

A reason Design History Files are required by law is that medical devices were failing in people after innovative companies were acquired by larger companies that re-introduced bad designs into the products.

I recommend making the Design History File and the plan the same document, just as I recommend making the plan and the final report the same document. You’d start with a plan and documenting all changes; in the end, that plan with the changes is your design history file.

Design Transfer

Design transfer is nothing more than ensuring you recorded all design features and it’s ready to be manufactured; it’s “make this pen” and be ready to make thousands of them.

Design transfer requires a design review to ensure that all inputs were satisfied by verification and validation testing of production-equivalent designs. This step is often part of validating your manufacturing process, and from this point design and manufacturing processes are linked: usually you can’t change one without re-validating the other.

A best-practice is to create a “trace matrix” that shows hall all inputs were satisfied by outputs by verification and validation, and agreed upon by a design review. In other words, make it easy for someone outside of your company to see that you met all needs through design features; this is especially important for risk management solutions.

  1. User need #UN1 (or UN2, or UN3, etc)
    1. Described in “our input document.doc”
    2. Described in requirements #MR1 (or MR2, MR3, etc) and #IR3 (or 4 or 5, etc)
    3. Addressed in design features (outputs) “_____” and “_____”
    4. Verified by tests #Ver8 (or 2 or 3, etc)
    5. Validated by tests #Val4 (or 9 or 10, etc)

A trace matrix quickly becomes long and complex, so I recommend starting a spreadsheet-style matrix as soon as possible and iterating it throughout development. And, like my advice to make the plan be the final report, I suggest making a trace matrix part of the plan, starting with most spaces blank so that they are simply checked off as development proceeds.


Summary

This is my advice for using the requirements for innovation and efficiency:

  1. Start with the intention to be innovative
  2. Understand your user’s needs
  3. Budget time for iterative design
  4. Create final testing first
  5. Ensure that you test designs throughout development, continuously improving both the designs and the tests
  6. Document all work

Next step


Keep in touch

My goal is to educate others so they’re able to do more things that benefit themselves and society. I consult corporations on international regulation requirements, teamwork, and innovation; and public schools on incorporating engineering and entrepreneurship into curriculum requirements. Connect on Linkedin.